Last Updated on December 14, 2020
On Facebook, you can still change the video default quality of any video you are watching depending on the quality the original owner uploads on Facebook. Facebook allows HD (High definition video as an option for video uploader.
In order to adjust the default quality of video you watch on Facebook, there’s an option on Facebook that allows one to stick to one video quality when when other options are available.
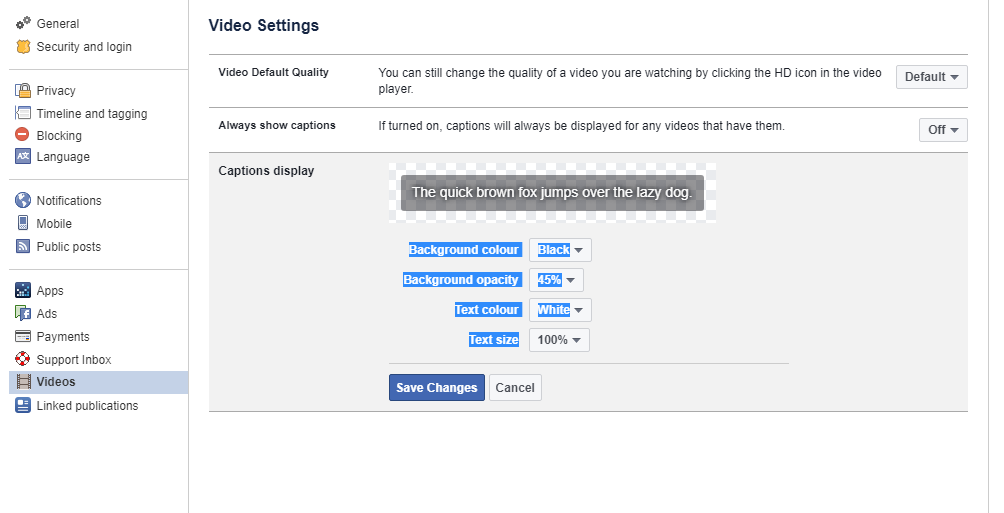
This is ideal for people that would want to optimize their data usage on Facebook. Video default quality options include;
- Default
- SD (Standard definition
- HD (high definition)
[ht_message mstyle=”info” title=”Note” show_icon=”” id=”” class=”” style=”” ]HD is optional during video uploads. [/ht_message]
Steps to change video default quality on Facebook
- Login to Facebook
- Click Settings
- Click Videos
- Under Video Default Quality, select which option to choose from
How to enable video captions on Facebook
- Login to Facebook
- Click Settings
- Click Videos
- Under Always show captions, select which option to choose from
[ht_message mstyle=”info” title=”Notice” show_icon=”” id=”” class=”” style=”” ]If turned on, captions will always be displayed for any videos that have them.[/ht_message]
How to customize video caption display on Facebook
- Login to Facebook
- Click Settings
- Click Videos
- Under Captions display, choose options to apply customization
- Background colour
- Background colour
- Background opacity
- Text colour
- Text size
Finally click Save changes.
We hope you found this article useful.